So the day of drugstore foundation reckoning is finally upon me...
- Khara Williams
- Jul 24, 2015
- 3 min read
... and if you want to learn the results of my little experiment, I (shamefully) am going to make you read through the photo story in this album.
ENJOY!
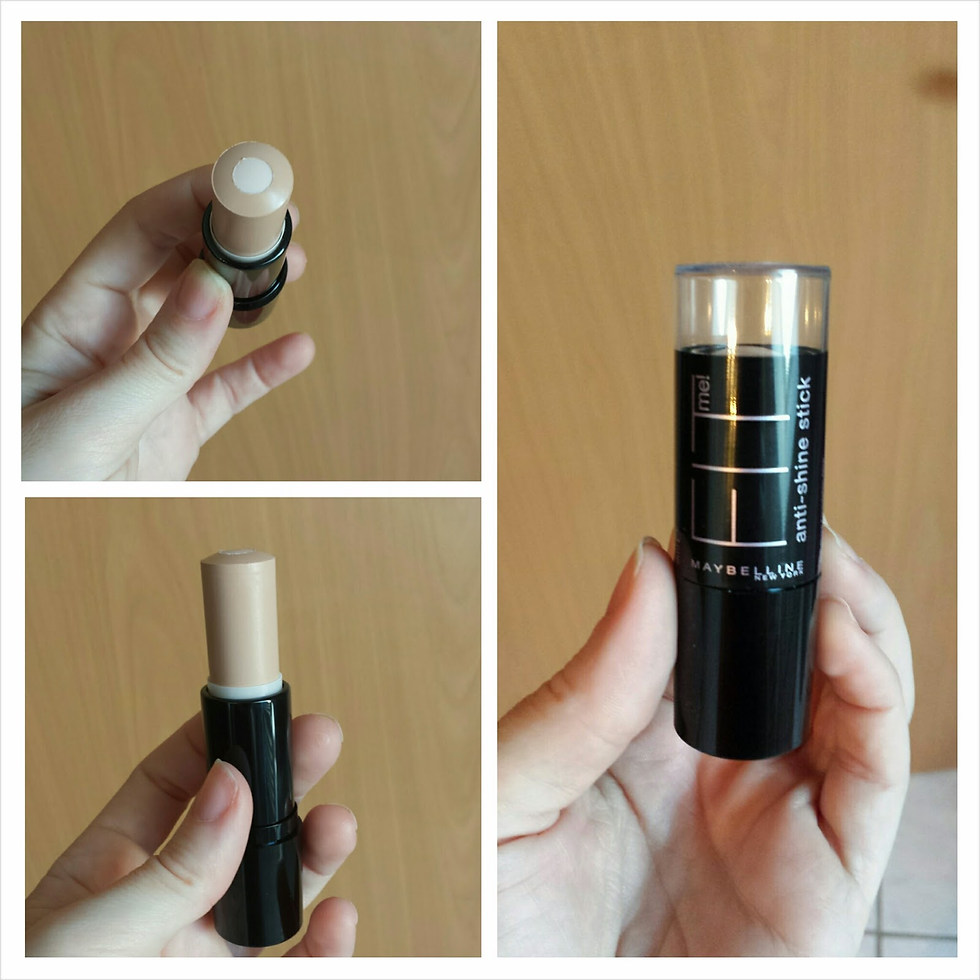
Photo 1: The Product

Maybelline Fit ME Anti-Shine foundation stick in Shade 120 – Classic Ivory
Had there not been testers out, I’d have passed up this product as it looked a little warm for my skin in the tube. When I tested it on my collar bone (where you should test foundation for an accurate match), it blended perfectly with my uber-pale olive skin.
http://www.maybelline.com/Products/Face-Makeup/Foundation/fit-me-shine-free-foundation.aspx
Photo 2: The Second Product (to combat my lovely under eye circles)

Maybelline Dream Lumi Touch Highlighting Concealer in shade Beige
Let’s talk about the name for a moment. It’s all wrong. You don’t want to highlight (bring attention to) something that you want to conceal (cover up). So it’s a misnomer. Aside from that, it’s a nice idea to make a light-reflective product to apply to dark areas that will disperse and reflect light… making the dark area not look so dark. This is NOT something you would put over a blemish (aka pimple) as it would just make it seem larger.
P.S. Light reflecting products like this are good for a number uses beyond just under the eyes, but I’ll cover that in later post.
http://www.maybelline.com/Products/Face-Makeup/Concealer/dream-lumi-touch-highlighting-concealer.aspx
Photo 3: The Tool

Original BeautyBlender
Every woman I’ve ever worked on that has seen this in my kit or had me use it on them has asked what it is. Is it the color that draws them in? The shape? I’m not sure, but the little godsend is a great way to flawlessly apply and blend (hence the name) base products into the skin. Simply get the egg wet (with water) then squeeze it out to remove the excess water. Rinse and repeat until it’s as big as it’s going to get. Now it’s ready to use.
I applied this stick foundation directly from the tube to my face (it’s for my personal use, after all) like I was putting on warpaint. Although I was kind of digging the urban warrior goddess look, I then used my beauty blender to melt the foundation into my skin, starting from the middle of large areas (like my cheek or forehead) and rolling the egg toward the outer edges of my face. The pointy end of the egg is perfect for tapping product into areas like the folds of the nose or even under the eyes.
http://www.beautyblender.net/
Photo 4: The Finish

Because the foundation’s name includes the hyphenated word ANTI-SHINE, I decided not to powder. The finish was lovely to start and was very dewy skin-ish. The “highlighting concealer” (I cringe at typing that!) applied in an inverted triangle shape under the eyes managed to break up the color of my under eye circles enough and add a bit of highlight to the height of the cheekbone as well.
I didn’t add eye makeup because the basis of this experiment was solely for base, however I have to admit that I did cheat and add mascara for the sake of not looking like a mole or some other animal with really, really small eyes.
My initial impression was, well… impressed. The finish is very similar to NARS Radiant Cream foundation when applied in the same manner and that product costs $38 + tax. The Maybelline foundation and concealer put me out about $20 total.
Something to take note of: the NARS foundation is 0.42 oz of product, the Maybelline foundation stick is 0.32 oz, and the Maybelline Lumi Touch is 0.05 oz. When choosing between products that perform similarly, the cost per ounce of the product is a good thing to consider.
Photo 5: The Aftermath

5 hours after application and I’d say my new Maybelline products held up well enough without powdering or even primer. It’s a warm, semi-humid day here and I have oily skin, so I’d say I’m still impressed with the products. I do have a fantastic (sarcasm) blemish village on one cheek right now and as I didn’t cake on the foundation there or use concealer (because remember… the one I got is not for pimples!), they’re starting to show through when they were covered initially. The red in my cheeks also started to show a bit (I never added blush or bronzer at all) after 5 hours too. It’s part of the dreaded makeup melt that powder helps to combat.
My deliberation? Maybelline has come a long way since I was 20. I give this foundation and the mis-named concealer a 4 out of 5. The color selection could be a little more broad and this would not be applying-with-your-hands (as many women do) friendly, but it’s held up well in temperate weather on a gal with combination skin without powdering.


Ever wondered what your actual face shape is? Knowing it can be super helpful for choosing the most flattering hairstyles, glasses, or even makeup techniques. If you're curious, an AI Face Shapes Detector can give you a quick and easy suggestion. You typically upload a photo, and the AI analyzes your facial contours to determine if you're oval, round, square, heart, etc. While it's a fun tool, it can provide a good starting point if you've always been unsure and want some guidance for your styling choices.